I.1) Concept:
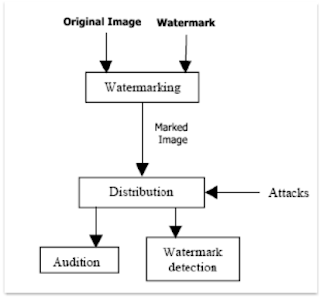
A watermarking system is usually divided into three distinct
steps, embedding, attack, and detection. In embedding, an algorithm accepts the
host and the data to be embedded, and produces a watermarked image.
Then the watermarked digital image is transmitted or stored,
usually transmitted to another person. If this person makes a modification,
this is called an attack. While the modification may not be malicious, the term
attack arises from copyright protection application, where third parties may
attempt to remove the digital watermark through modification.
Detection (often called extraction) is an algorithm which is
applied to the attacked image to attempt to extract the watermark from it. If
the image was unmodified during transmission, then the watermark still is
present and it may be extracted. In robust digital watermarking applications,
the extraction algorithm should be able to produce the watermark correctly,
even if the modifications were strong. In fragile digital watermarking, the
extraction algorithm should fail if any change is made to the image.
Types of Watermarks: Visible Watermarks – These watermarks
are visible. Invisible Watermarks – These watermarks are embedded in the media
and use steganography technique. They are not visible by naked eyes.
I.2) Watermarking an image:
We develop our app using JavaScript programming language,
and this language offers a great image processing and manipulation APIs, so in
our case we’re using the “canvas fill text “API to embed certain text as a
watermark on the input image.
a) CanvasRenderingContext2D.fillText():
The CanvasRenderingContext2D method fillText(), part of the
Canvas 2D API, draws a text string at the specified coordinates, filling the
string's characters with the current fillStyle. An optional parameter allows
specifying a maximum width for the rendered text, which the user agent will
achieve by condensing the text or by using a lower font size.
This method draws directly to the canvas without modifying
the current path, so any subsequent fill() or stroke() calls will have no
effect on it.
The text is rendered using the font and text layout
configuration as defined by the font, textAlign, textBaseline, and direction
properties.
Syntax:
CanvasRenderingContext2D.fillText(text, x, y [, maxWidth]);
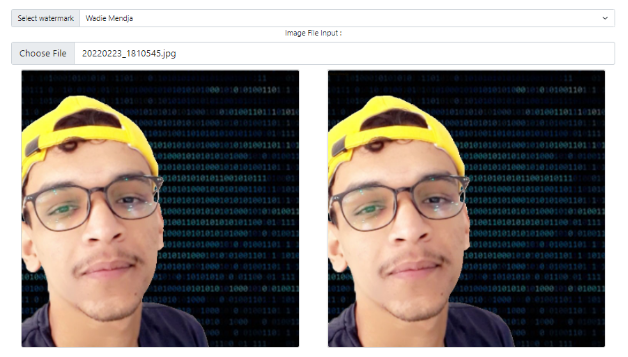
Here is an example of how it works, in the screenshot below
we have on the left side the original image and the watermarked image on the
right side, the “Select Watermark” text field contains the text that we should embed
on the image as a watermark, we did that using the syntax that we talked about
earlier
Maybe you didn’t notice any difference between the two images
and that’s because we’re embedding an invisible watermark, but if we try to
make the watermark visible it’s going to look like that:
And here is the function that does all this work:
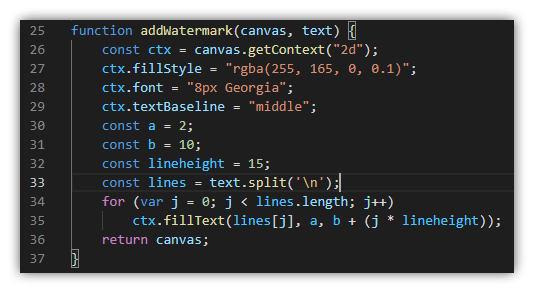
In which the “fillStyle” property specified the color and
the opacity (alpha component) of the text that we’re trying to insert into the
image, also we have “font” property which specifies the size of the text and
its font, the constants “a” & “b” defines the position of the text on the
inserted image.
Now that we’re done with the watermarking part lets skip up
to the good parts which are generating a dataset of image (watermarks) and
training a neural network to be able to detect it.
I.3) Generating a dataset:
Before generating a dataset of watermarks, we should first
create them, so in our app we’re using three
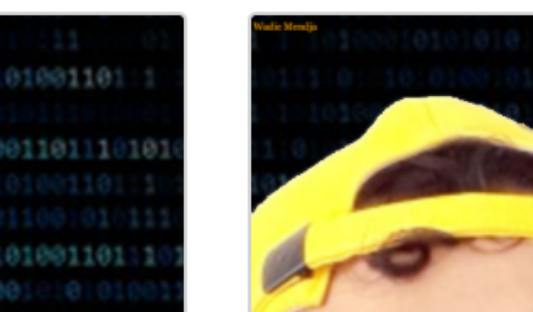
different watermarks basically images that are filled with the following texts “Wadie Mendja”, “Zeghamri Salah” and “Daham A” which they look like this:
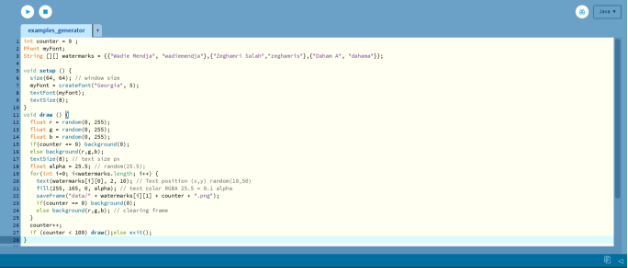
Those are the original watermarks, now we need to images similar to them by changing the text opacity, position and background color, so for this task we’re using a programming language called processing which is a graphical library and integrated development environment built for the electronic arts that’s going to help us generate multiple frames (images) and save them in our machine so we can use them in the training process, here you can take a look at the program:
All what this program does is generate a bunch (100 in this
case) of frames (images) with a size of 64x64 pixels that contains the
watermarks above that we talked about (Wadie Mendja | Daham A | Zeghamri Salah)
but with different sizes, positions, opacities and background colors, and finally
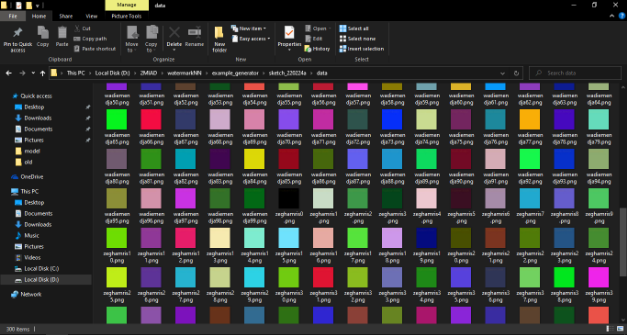
save them as png files in a folder called “data”, that’s it.
Here is a screenshot of the “data” folder after the
execution in done:
I.4) Training the dataset:
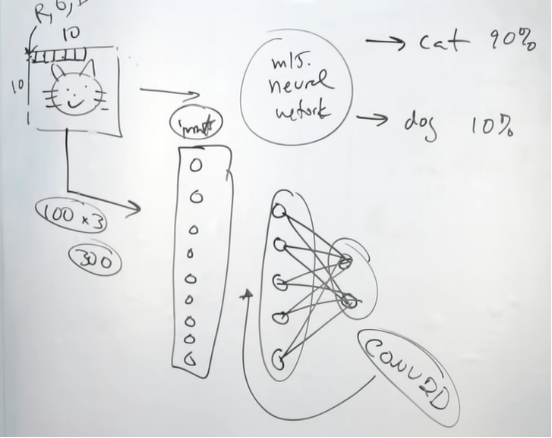
Our NN is going to take each image’s individual pixel (RGBA)
value as an input to the first layer of our NN, the example below shows a
classification NN that tell the difference between a dog and a cat:
So, in this particular step we’re going to be using a
library called “ml5.js” which uses the TensorFlow framework and has a predefined
neural network class which will allow as to train a model and do the
classification after the training process, all we have to do is give it the
dataset and a label for each particular watermark, in general the steps for
using the ml5.neuralNetwork look something like:
Step 1: load data or create some data
Step 2: Set your neural network options & initialize
your neural network
Step 4: add data to the neural network
Step 5: Normalize your data
Step 6: Train your neural network
Step 7: use the trained model to make a classification
Step 8: do something with the results
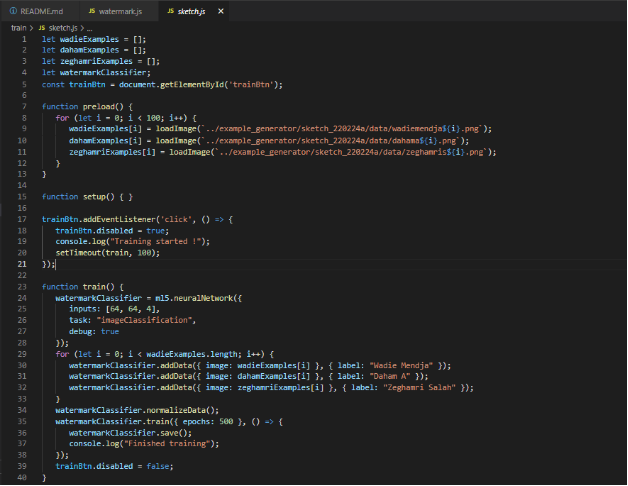
Our dataset (100 sample for each watermark) will be trained
with 50 epoch (stopping criteria) using sigmoid activation function, here is
the code that does the training process:
Training performance:
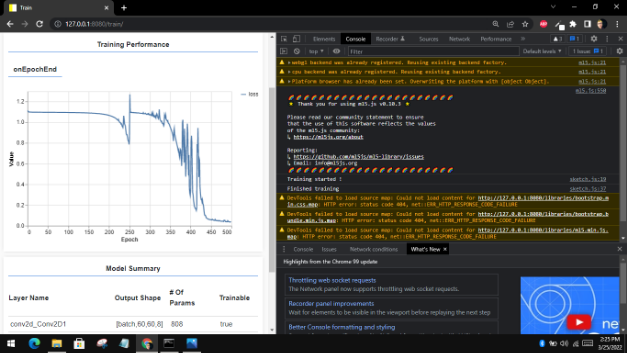
An epoch in machine learning simply means one complete pass
of the training dataset through the algorithm. This epochs number is an
important hyperparameter for the algorithm. It specifies the number of epochs
or complete passes of the entire training dataset passing through the training
or learning process of the algorithm.
I.5) Watermark extraction:
After we’d finished training our NN and got our model files
(weights and meta data files), now it’s time to try it out and see if it will
give us some decent results or not, so to do that we need to load our
pretrained model to our app and trigger the “classify” method and see the
results. Here is a piece of the code that does that:
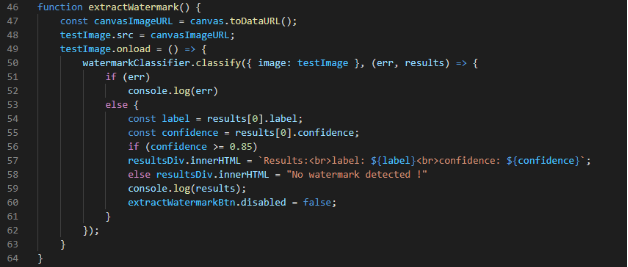
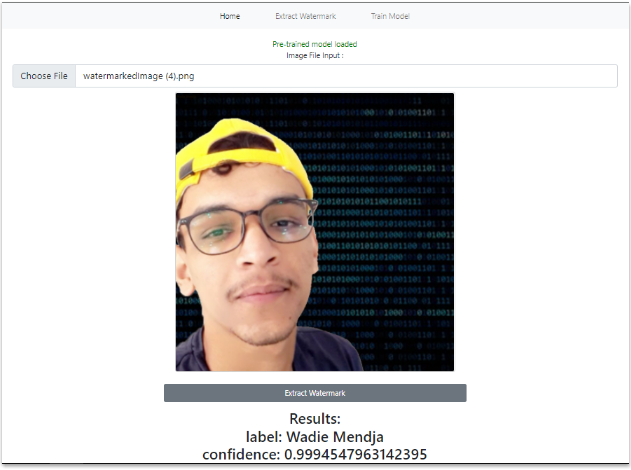
Results with a confidence score of 99.94% and an error of 0.06% which is a good indicator of a well-trained model, although we applied a compression attack on the image (Vectorial Quantization) but still the results turned out to be pretty good:
I.6) Conclusion:
Although we got great results on the example above that we applied, however there are some cases were the image get damaged by some attack or compression algorithms in a way that even a well-trained neural network cannot be able to detect the embedded watermark or even if it did it will be with a low confidence score which means a higher error, and the higher the error goes the less we are sure about whether a certain watermark exists in an image or not.





0 Comments